
Beeswax wraps are the perfect solution for anyone tired of struggling with plastic wrap (you know who you are). If you’re anything like me, you’ve grown tired of fighting to get the plastic wrap off the roll. Even once you manage to peel it away, it ends up stuck to itself instead of the item you’re trying to cover with it.
Stop wrestling with store-bought plastic wrap and start enjoying the freedom that comes with using beeswax wraps instead. Not only are they better for the environment but making – and reusing them – saves you money in the long run.
You can buy premade beeswax wraps, or you can make them. In this blog, we’ll explore:
- What are beeswax wraps?
- What are the benefits of beeswax wraps?
- Can you make your own beeswax wraps?
- How do you make beeswax wraps?
- How do you safely use beeswax wraps?
- Can you clean beeswax wraps for reuse?
What are beeswax wraps?
Beeswax wraps are a type of eco-friendly food storage option you can use as an alternative to plastic wrap and aluminum foil. They are a sustainable option because they’re biodegradable, compostable, and don’t produce any harmful chemicals or waste.
Most beeswax wraps are made by coating a thin layer of cotton or hemp fabric with a mixture of beeswax, tree resin, and jojoba oil. The mixture is heated and spread over the fabric, creating a breathable and flexible wrap you can mold around food or other containers.
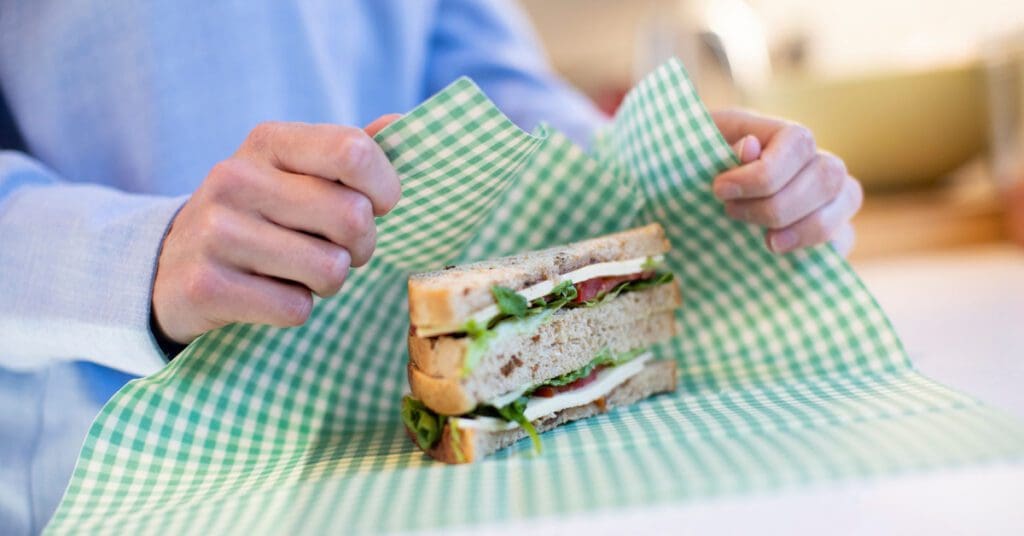
You can use beeswax wraps to cover bowls, wrap sandwiches or cheese, and store fruits and vegetables. It’s safe to reuse them for up to a year when you clean and care for them properly (we’ll talk more about that later).
What are the benefits of beeswax wraps?
One of the biggest benefits of replacing plastic wraps and aluminum foil with beeswax wraps is that they’re eco-friendly. Their ingredients are biodegradable and compostable, making them a sustainable alternative to single-use products.
Some of the other benefits include:
- Antibacterial properties. Beeswax and tree resin have natural antibacterial properties. Using it for food storage keeps your items fresh and reduces the risk of contamination.
- Breathable. Keeping your food fresh for as long as possible is one of the advantages of using beeswax wraps instead of plastic wrap or foil. The material in the wraps allows for better airflow, which keeps your food fresher for longer.
- Natural ingredients. Avoiding harmful chemicals is a goal of most homesteaders. Beeswax wraps contain all-natural ingredients, making them a safe option for food storage.
- Reusable. With proper care, you can reuse wraps for up to a year, reducing waste and saving money. When you’re done with them, they can be tossed into your compost.
- Versatile. Anything you can do with plastic wrap you can do with beeswax wrap. Cover food storage containers and wrap sandwiches for lunch with them.
Can you make your own beeswax wraps?
Yes, you can make your own beeswax wraps with the right ingredients. You’ll need some materials and ingredients to get started. Most of what you need you can order online or buy in a local store.
Homesteaders who double as beekeepers already have a key ingredient needed to make homemade beeswax wraps: beeswax.
Bees created the original food storage system with the honeycombs that line the inside of their hives. They use them to keep their honey and pollen safe. You can use the material to make beeswax wraps.
For every pound of wax bees produce, they must eat up to 8 pounds of honey! That’s a lot of honey! Female worker bees make the beeswax used to build honeycombs. Be sure to thank them for their hard work when you use beeswax to make wraps.
How do you make beeswax wraps?
It’s not hard to make beeswax wraps. However, you need the right supplies and some patience, especially if it’s your first time trying to make them yourself.
Follow our step-by-step instructions on what materials you need and how to combine them to get the perfect natural wraps for your homestead food storage needs.
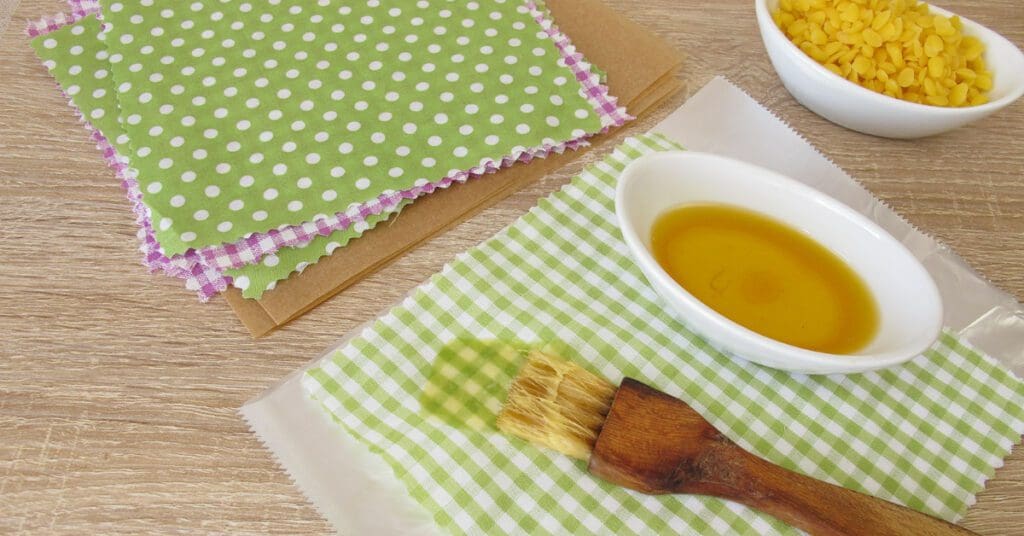
Supplies you need:
- 100% cotton fabric (prewashed and dried)
- Beeswax pellets or grated beeswax
- Tree resin
- Jojoba oil
- Parchment paper
- Baking sheet
- Paintbrush
- Scissors
How to do it:
Step 1 – Cut the fabric into the desired size for your wraps. You may want a variety of sizes for covering small and large food storage containers.
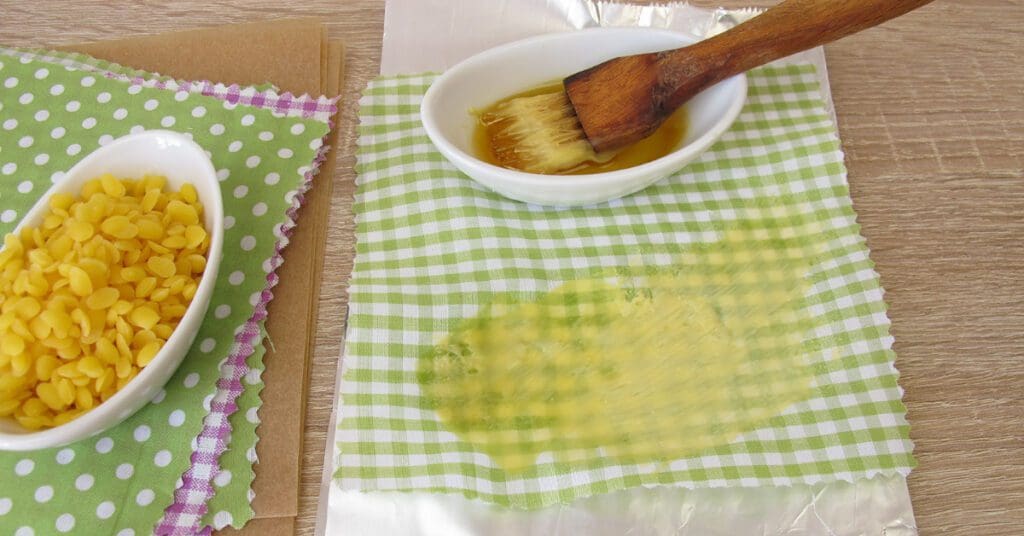
Step 2 – Melt the beeswax, tree resin, and jojoba oil together in a double boiler om low heat until completely melted.
Step 3 – Use a paintbrush to spread the melted mixture evenly over the fabric.
Step 4 – Place the fabric on a baking sheet lined with parchment paper. Put it in the oven at 150-170 degrees Fahrenheit for 3 to 5 minutes (or until the wax has melted and soaked into the fabric).
Step 5 – Remove from the oven and let it cool for a few minutes.
Step 6 – Peel off the wrap from the parchment paper and continue to allow it to cool.
Step 7 – Trim the edges with scissors if necessary.
Finding the right mixture of wax needed to make a perfect size (and thickness) depends on several factors, including the size of the fabric. It can take some trial and error to get it right, so don’t get discouraged if your homemade beeswax wraps don’t turn out quite as you envisioned on your first try.
How do you safely use beeswax wraps?
You already know that beeswax wraps are safer than traditional plastic wraps because they don’t contain any toxic chemicals. You’ll want to follow a few guidelines for using them safely for food storage on your homestead.
- Avoid high heat. Unfortunately, you can’t use them in the microwave or oven. Exposing them to high temperatures or direct heat sources can degrade the wax and damage the fabric.
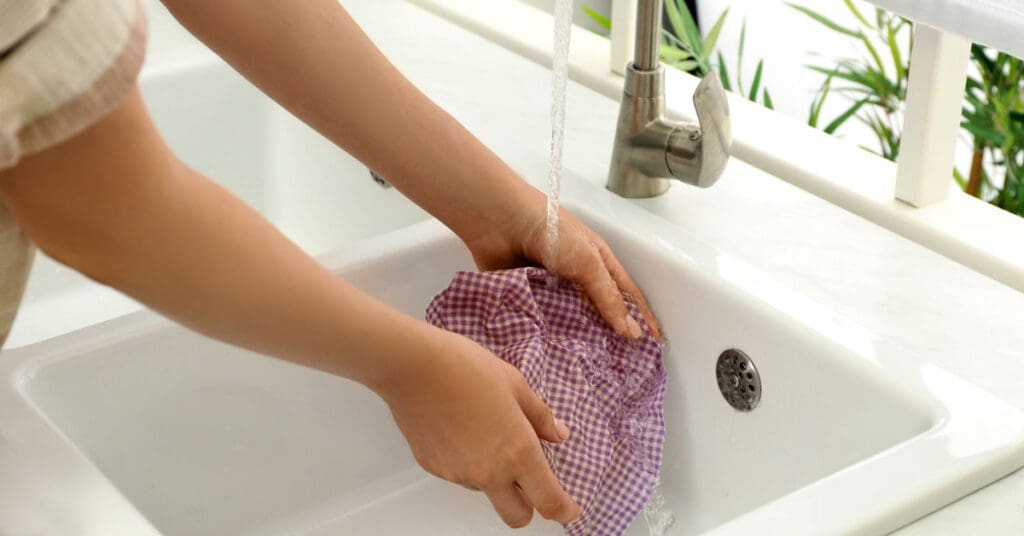
- Clean before and after use. Wash your beeswax wraps before the first use with mild soap and cool water. Never use hot water. It can melt the wax. Allow them to air-dry. Repeat this process after each use.
- Store properly. When you’re not using your homemade wraps, keep them in a cool, dry place away from direct sunlight. Never fold or crease them to prevent damage to the wax coating.
- Wrap securely. Make sure the beeswax wrap is securely wrapped around the food or food container. Eliminate any gaps or air pockets to keep your food fresh and protected.
Your homemade wraps won’t last forever. With proper care, you can expect to get about a year out of each wrap. Watch for cracks and stiffness, two of the tell-tale signs they’ve lost their effectiveness. Replace them at the first sign of trouble.
Can you clean beeswax wraps for reuse?
Yes, you can clean your beeswax wraps for reuse for up to a year. Always use mild soap and cool water to cleanse them. Avoid hot water because it can melt the wax.
Never use abrasive sponges or scrubbers because they also can damage the wax coating, making the wraps less effective. Always air dry them after cleaning for the best results.
When your wraps wear out, don’t throw them out. Toss them into the compost. They’ll break down since all ingredients are biodegradable.
Reduce waste with beeswax wraps
Using plastic wrap isn’t just bad for the environment. It can cause health issues because of the toxic chemicals used to manufacture it.
You can reduce your waste, become more self-sufficient, and protect your family’s health with homemade beeswax wraps. They’re a safe and affordable way to store all your homestead favorites safely.
Sources
- Beeswax-Modified Textiles: Method of Preparation and Assessment of Antimicrobial Properties. ncbi.nlm.nih.gov. Accessed April 14, 2023.
- Implementing the EU Chemicals Strategy for Sustainability: The case of food contact chemicals of concern. sciencedirect.com. Accessed April 14, 2023.
- Investigate how honeybees construct combs out of wax to store honey, plant nectar, and bee bread. britannica.com. Accessed April 14, 2023.

Popular Articles


Newsletter
Get signed up to get latest updates and new information from the Jersey Milk Cow!

Leave a Reply