
Summertime is here. If you’re anything like us, hosting family and friends for outdoor gatherings is an important part of your summer fun traditions.
Figuring out what to serve includes food and refreshments. The food part is easy if you have a grill. Just toss on some of your favorite meats and veggies and voila! You have a quick and easy meal for everyone.
Deciding what drinks go best with your entrée and desserts is sometimes more challenging. That’s where kombucha comes in.
If you’re asking yourself, “kombu, what?” then this blog is for you. In it, we discuss:
- What is kombucha?
- Why make homemade kombucha?
- What do you need to get started?
- What is the brewing process for homemade kombucha recipes?
- How do you add flavoring and carbonation?
- What are some common issues with homemade kombucha recipes?
- How do you safely store homemade kombucha?
What is kombucha?
Kombucha is a fizzy and tangy fermented beverage that has become a popular and refreshing summer drink. Its origins are a bit elusive, but it’s believed that it originated in East Asia thousands of years ago.
Its exact beginnings may be obscured by time, but that hasn’t stopped it from becoming steeped in legend and folklore.
One popular theory has kombucha first being brewed in ancient China during the Qin Dynasty around 220 BCE. The drink was revered for its detoxification and energizing properties. It was highly prized among emperors and nobility. You wouldn’t have found many common folks like us enjoying it in those days.
Another theory places Japan as kombucha’s birthplace, where the culture’s traditional tea and fermentation practices align well with how kombucha is made.
We may never know how it started, but that doesn’t stop us from enjoying it.
Basic ingredients for homemade kombucha recipes
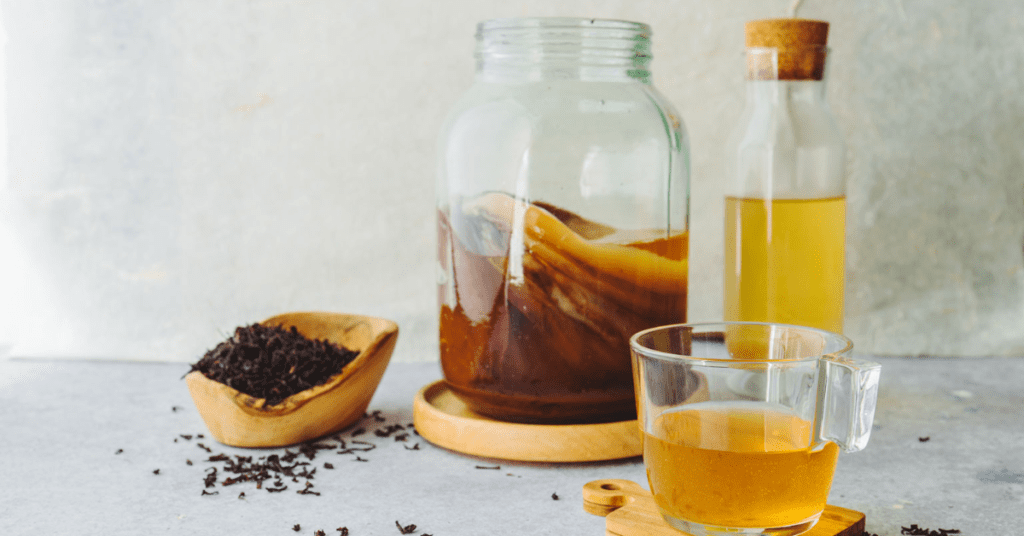
Some of the basic ingredients of most homemade kombucha recipes are tea, sugar, and a Symbiotic Culture of Bacteria and Yeast (SCOBY). Of these ingredients, SCOBY is arguably the most important. It’s responsible for the fermentation process that transforms sweetened tea into the tangy and bubbly beverage known as kombucha.

Why make homemade kombucha?
The advantages of using homemade kombucha recipes to make this tasty summer favorite are plentiful. For starters, it’s cheaper than buying pre-made kombucha in the store. You’ll pay anywhere from $3 to $5 for a 16-ounce bottle of store-bought kombucha. Ouch!
The initial investment in the materials you’ll need to make your own at home is around $50. However, you can reuse all these materials each time, only adding a cup of sugar and 8 tea bags of your choosing to a packet of SCOBY to produce roughly 128 ounces of kombucha.
When you break it down, there’s no comparison in cost. You’ll spend about $0.08 for 16 ounces of homemade versus the $3 to $5 you’ll spend on the same amount in the store.
Another reason to make your own kombucha is the ability to customize your flavors. You can choose from a variety of homemade kombucha recipes, or experiment by combining the basic ingredients with some of your favorite flavors to create something new.
What do you need to get started?
Before you can get started with a homemade kombucha recipe, you’ll need to purchase some equipment. All these items are reusable, so once you make the initial investment, that’s it.
Here’s a list of the essentials:
- Glass jar(s) with a wide opening to serve as the primary fermentation container. We recommend a gallon-sized jar but feel free to adjust the size based on your individual needs.
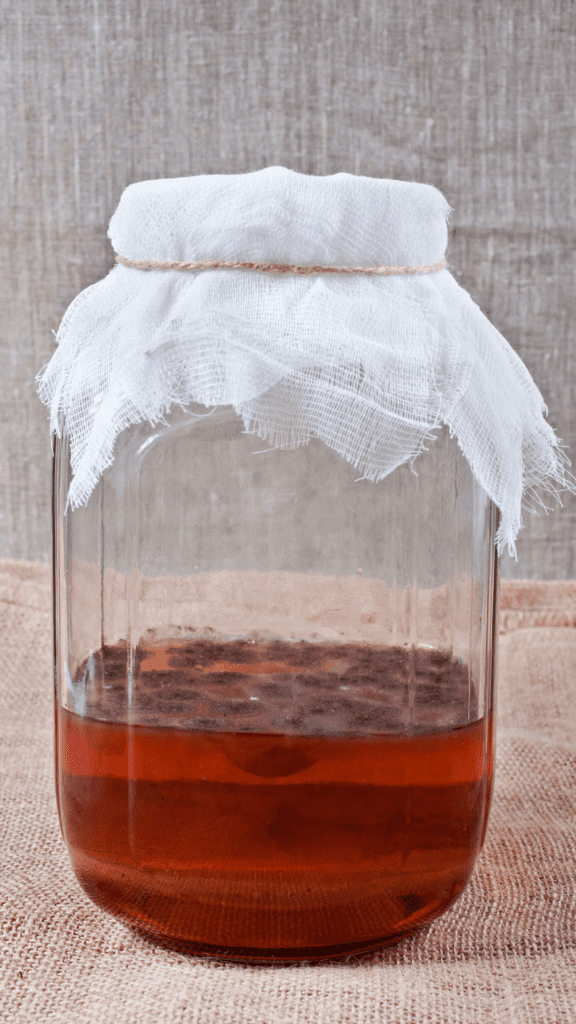
- Cloth cover or breathable lid to cover the jar during fermentation to keep out debris, dust, and insects is an important part of all kombucha recipes.
- SCOBY to initiate the fermentation process from a reputable source or another friend who makes homemade kombucha.
- Starter liquid to help kick-start the fermentation process. If you previously brewed some kombucha, you could use a portion of it to start a new batch.
- Organic black or green tea works best for brewing kombucha. Avoid tea with added oils, flavors, or herbal blends. Loose-leaf tea or tea bags are suitable options.
- Sugar is required for the fermentation process to work. It’s a food source for the SCOBY. We prefer organic cane sugar. Never use artificial sweeteners or honey because both interfere with fermentation.
- Brewing thermometer to monitor the temperature of the brewing liquid. Kombucha ferments best between 68- and 85 degrees Fahrenheit.
- pH strips monitor the acidity levels of kombucha to ensure the fermentation process is working properly.
- Brewing vessels (additional glass bottles) with airtight lids are needed for the secondary fermentation process. You also use the vessels to flavor your kombucha and achieve carbonation.
- Funnel and strainer for transferring the kombucha from the primary to the secondary vessels and removing any sediment or unwanted particles.
Make sure you clean and sanitize all equipment before and after use to keep from introducing harmful bacteria to your homemade kombucha recipe.

What is the brewing process for homemade kombucha?
Following a homemade kombucha recipe requires dedication and patience. It’s not a quick process by any stretch of the imagination. But we promise the effort is worth it once you taste the fruits of your labor.
Here’s a step-by-step process for brewing homemade kombucha.
- Step 1: Gather your equipment and ingredients.
- Step 2: Prepare the tea base according to your recipe.
- Step 3: Add sugar to your tea base and stir until completely dissolved. Allow the tea to cool to room temperature.
- Step 4: Combine tea and starter liquid in the fermentation jar.
- Step 5: Cover and ferment, which can take 7 to 14 days depending on your taste preferences and the instructions in the kombucha recipes you select.
- Step 6: Monitor the fermentation to check the temperature and pH levels.
- Step 7: After 7 days, taste the kombucha using a clean spoon and repeat daily until it reaches your desired level of tanginess.
- Step 8: Prepare the mixture for secondary fermentation per your recipe.
- Step 9: Flavor and carbonate, getting as creative as you’d like. Seal the bottles and allow them to ferment for another 1 to 7 days.
- Step 10: Refrigerate the mixture and chill for a few hours before enjoying it. Remember to keep some kombucha as a starter for your next batch.
How do you add flavoring and carbonation?
Adding flavoring to your homemade kombucha is done during the secondary fermentation process. You can use fruits, herbs, spices, and flavor combinations of any of those ingredients to come up with your unique taste.
Fruits add a burst of zing to your mixture. Some of our favorites to add include:
- Berries (blackberries, blueberries, raspberries, strawberries).
- Citrus fruits (lemon, lime, orange).
- Stone fruits (cherries, peaches, plums).
- Tropical fruits (mango, passionfruit).
Herbs and spices that work well with most kombucha recipes include:
- Cardamom
- Cinnamon
- Ginger
- Mint
Some of the flavor combinations we’ve found work well together include:
- Blueberry and lavender
- Orange and cardamom
- Peach and basil
- Pineapple and ginger
- Raspberry and lemon
What are some common issues with homemade kombucha?
Following homemade kombucha recipes isn’t without its complications. If you’re new to the process, you might find your finished product moldy, excessively acidic, or that it just tastes a bit “off.”
- Mold growth is a common concern with home kombucha brewing. It starts out as fuzzy patches on the surface of your SCOBY or liquid. To prevent mold growth, ensure a clean and sterile environment, use proper hygiene practices, and avoid exposure to contaminants. If mold develops, you must discard the entire batch, thoroughly clean all equipment, and start over with fresh SCOBY and starter liquid.
- Excessive acidity can make your kombucha taste too tart. It usually happens if you’ve failed to add enough sugar or allowed the mixture to ferment too long. To prevent it, reduce the fermentation time or add a bit more sugar to the tea base with the next batch.
- Off-flavors can be sour or vinegary or just plain gross. Sometimes they’re caused by over-fermentation, improper temperature control, or contaminants in the SCOBY or starter liquid. Reduce the fermentation time and make sure all ingredients and materials are sterile before making a new batch.
How do you safely store homemade kombucha?
Once you’ve spent all that time brewing your homemade kombucha, make sure you safely store it so you can enjoy it. If you don’t store it correctly, it’ll lose its flavor, carbonation, and overall quality. Here’s what you need to do once it’s finished.
- Refrigerate the mixture as soon as secondary fermentation is complete. Refrigeration stops the fermentation process and prevents an excessive buildup of carbonation. The ideal temperature is 35 to 45 degrees Fahrenheit.
- Airtight bottles with secure lids are a must to prevent air from entering the bottles and making the mixture go flat. Avoid using plastic containers when possible.
- Monitor the shelf life, which is roughly several weeks when stored properly. If you’ve not consumed it within a month, it’s best to toss it.
- Reserve starter liquid before you refrigerate your kombucha so you have some for starting your next batch.
Can Kombucha Help Soothe a Cough?
There is limited scientific evidence to suggest that homemade cough remedies like kombucha can soothe a cough. While kombucha contains probiotics that can support a healthy immune system, it’s best to rely on traditional cough medications for relief. Always consult a healthcare professional for severe or persistent symptoms.
Enjoy summer with homemade kombucha recipes
Following homemade kombucha recipes is time-consuming but well worth the effort. You’ll have an amazingly refreshing drink for the summer your family and friends will enjoy. You can save money while enjoying the many benefits of this ancient drink.

Popular Articles


Newsletter
Get signed up to get latest updates and new information from the Jersey Milk Cow!

Leave a Reply