
Learning how to can raw chicken safely is an important skill for homesteaders striving to become more self-sufficient. If you raise chickens on your homestead farm, you may need to slaughter them before you’re ready to eat them.
Freeze-drying or canning cooked chicken is fine, but not everyone wants the hassle of taking those extra steps to preserve meat from their chickens.
The good news is it’s possible to can raw chicken safely to extend the shelf life of the meat. In this blog, we’ll answer some of the most common questions about canning raw chicken safely, including:
- Why can raw chicken?
- What supplies do you need to can raw chicken?
- What are the steps for safely canning raw chicken?
- How long can you safely store raw canned chicken?

Why can raw chicken?
Some people shy away from canning raw chicken because they worry about making themselves sick. Canning raw chicken is risky because it’s a low-acid food. That means it’s susceptible to bacterial growth, including Clostridium botulinum, which causes botulism.
Canning raw chicken doesn’t automatically mean you’ll have this problem. Using high enough temperatures during the canning process to properly sterilize the food and the canning jars and lids reduces the risk.
If you’re skeptical about canning raw chicken, let’s talk about some of the reasons why you should consider it to help you decide.
- It’s cost-effective. Raising chickens is a cost-effective way to access fresh eggs and chicken meat. Learning how to can raw chicken means you won’t waste any fresh meat you can’t immediately consume.
- It saves time. When you want to make a meal with fresh chicken, all you do is open a jar and you’re ready to go.
- It prevents waste. No homesteader likes to waste food, especially from livestock they’ve raised. Canning raw chicken makes sure every chicken you butcher is used wisely.
- It saves freezer space. Freezing food is OK, but it takes up a lot of space. Frozen food also has a shorter shelf life than canned goods.
The canned raw chicken myth
If it helps you get more comfortable with the idea, let’s talk about one of the biggest myths about canned raw chicken. Canned raw chicken isn’t raw once you go through the canning process.
You may start out with raw chicken in your canning jars. However, by the time you’re done raw packing or hot packing it, the chicken inside comes out fully cooked. If you follow the canning recipe properly, you avoid any scary issues with food poisoning when you consume the chicken later.
As a bonus, you don’t have to worry about raw canned chicken being dry or stringy. When done correctly, your chicken is juicy and tender.
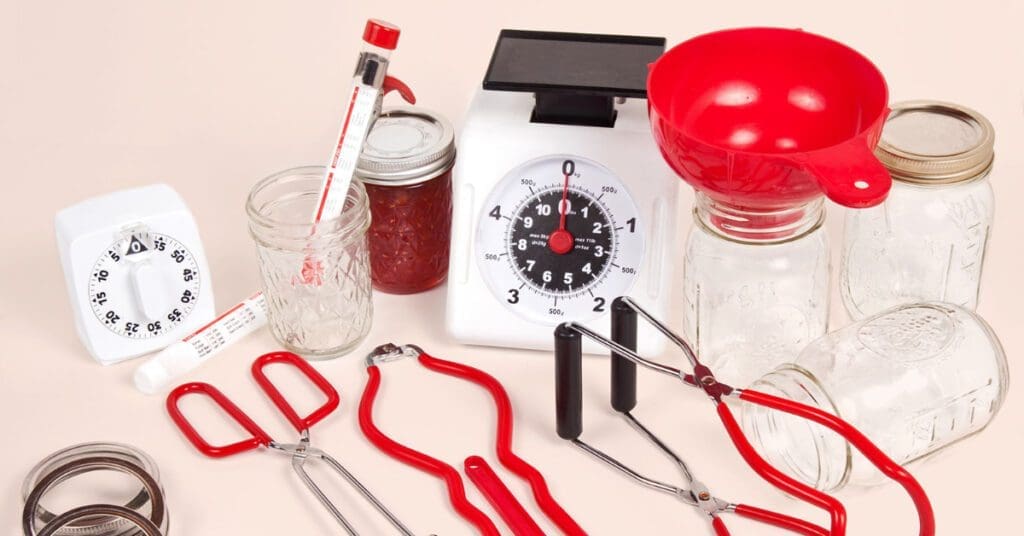
What supplies do you need to can raw chicken?
You use some of the same supplies to can raw chicken that you use for canning other foods. Before you start butchering your chickens for canning, make sure you have the following supplies on hand.
- Canning jars with lids and bands.
- Canning funnel.
- Clean, hot water.
- Cutting board.
- Headspace removal tool
- Jar lifter.
- Kitchen towels.
- Large pot for boiling water.
- Pressure cooker.
- Raw chicken (bone-in or boneless)
- Salt (can substitute with sea salt)
- Sharp knives.
- Tongs
What are the steps for safely canning raw chicken?
The first step for canning raw chicken safely is to use fresh chicken that was properly handled and stored. Only can fresh, raw chicken using this recipe. Set the chicken aside until you’re ready for it.
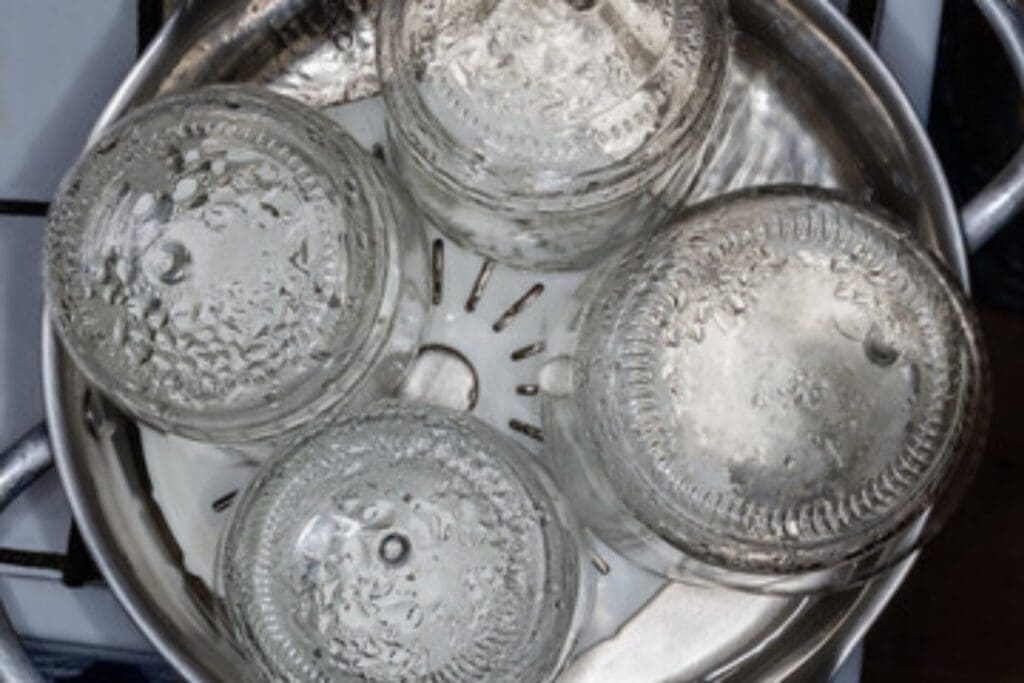
Next, wash your hands and sanitize all surfaces you plan to use for the canning process. Make sure all mason jars and lids are sterilized.
Here are the remaining steps in the process:
- Step 1 – Fill the pressure cooker with 2 inches of water. Heat it until it’s hot but not boiling.
- Step 2 – Put a rack in the bottom of the pressure cooker to keep your jars from banging together and breaking.
- Step 3 – Keep your jar lids, jar lifter, headspace removal tool, and large canning funnel nearby and ready to use.
- Step 4 – Chop the fresh, raw chicken into 1-inch square pieces.
- Step 5 – Wash your hands before grabbing jars from the pressure cooker. Dump out any water that got inside the jars before you use them.
- Step 6 – Use your tongs and funnel to fill each canning jar with about 2 cups of chicken. Make sure you leave at least 1-1/4 inches of head space at the top of the jar.
- Step 7 – Add a half inch of hot water in each jar to keep the top pieces of chicken from drying out during storage.
- Step 8 – Add about ½ teaspoon of salt to each jar. You can skip this step if you’re on a low-sodium diet. The salt doesn’t do anything for preservation. It’s simply used for taste.
- Step 9 – Wipe down the outside of the jars and the rims with a hot water and vinegar mixture to help the jars seal.
- Step 10 – Secure your canning lids and bands on each jar. Be careful you don’t overtighten them.
- Step 11 – Put all your sealed canning jars of raw chicken into the pressure cooker using your jar lifter. Then, follow the manufacturer’s recommendations for your model of pressure cooker to heat it up to medium temperature on the stovetop.
- Step 12 – Watch for steam to come out of the steam vent. Once that happens, set a timer for 10 minutes. Once the 10 minutes are up, add your weight to the pressure cooker. You can check the chart that came with your pressure cooker to determine how much pressure you need.
- Step 13 – Once your dial gauge reaches pressure, you can restart your timer and begin processing the chicken. It can take up to 90 minutes to process depending on the size of your canning jars.
- Step 14 – Turn off the heat and allow the pressure canner to return to zero pressure naturally. Don’t remove your weighted gauge during this time. Once the pressure hits zero, remove the weighted gauge and allow any extra steam to release.
- Step 15 – Remove the lid carefully and use the jar lifter to get the jars out. You’ll want to let them cool for at least 12 hours.
- Step 16 – Once the jars have cooled, check the seals. If all is well, store your chicken in your pantry until you’re ready to use it. Any jars with improper seals should be refrigerated and used within 48 hours.
Can the same canning process be used for raw milk artisanal soaps as it is for raw chicken?
No, the canning process cannot be used for raw milk artisanal soaps as it is for raw chicken. The process for raw milk artisanal soaps tutorial involves different methods and ingredients compared to canning raw chicken. It’s important to follow the specific instructions for each product to ensure safety and quality.
How long can you safely store raw canned chicken?
If the lid stays sealed, you can safely store the raw canned chicken for up to 10 years. Just because you can store it that long doesn’t mean you should. For the best taste and nutritional value, you should eat your canned chicken within a year.
Never eat canned foods that appear to have gone bad. If the color of the chicken fades, or the juices appear to be growing mold, it’s no longer safe to eat.

Popular Articles


Newsletter
Get signed up to get latest updates and new information from the Jersey Milk Cow!

Leave a Reply